datetime:2023/10/07 10:21
author:nzb
该项目来源于大佬的动手学ROS2
9.3.使用gazebo加载URDF
1.Gazebo-ROS2插件介绍
gazebo是独立于ROS/ROS2之外的仿真软件,我们可以独立使用Gazebo。如果我们想要通过ROS2和Gazebo进行交互,需要通过gazebo_ros插件来进行。
接下来先带你通过命令行的形式来启动gazebo-ros2插件以及使用插件提供的服务来将fishbot的urdf模型在gazebo中显示出来。
1.1 安装Gazebo插件
sudo apt install ros-humble-gazebo-ros
1.2 启动Gazebo并启动插件
安装完成后,我们就可以通过下面的命令行来启动gazebo并加载ros2插件。
gazebo --verbose -s libgazebo_ros_init.so -s libgazebo_ros_factory.so
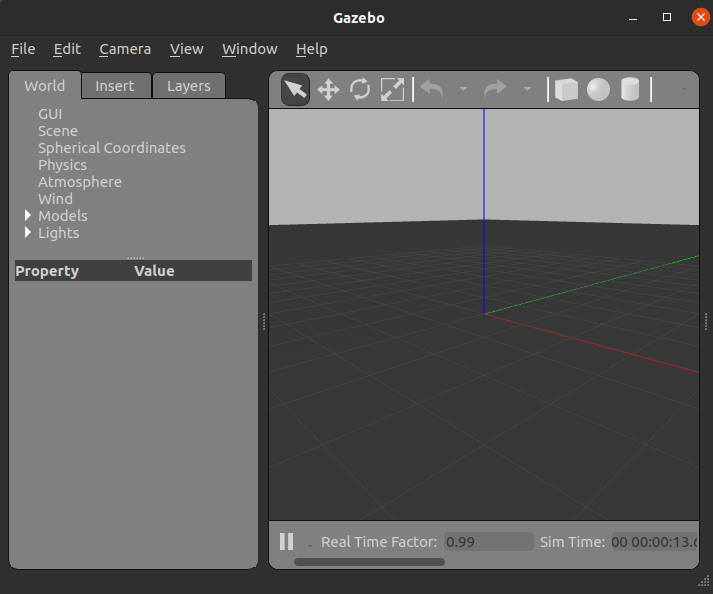
看到下面的日志和Gazebo界面代表启动成功
Gazebo multi-robot simulator, version 11.9.0
Copyright (C) 2012 Open Source Robotics Foundation.
Released under the Apache 2 License.
http://gazebosim.org

[Msg] Waiting for master.
Gazebo multi-robot simulator, version 11.9.0
Copyright (C) 2012 Open Source Robotics Foundation.
Released under the Apache 2 License.
http://gazebosim.org

[Msg] Waiting for master.
[Msg] Connected to gazebo master @ http://127.0.0.1:11345
[Msg] Publicized address: 192.168.2.103
[Msg] Loading world file [/usr/share/gazebo-11/worlds/empty.world]
[INFO] [1649151283.208884022] [gazebo_ros_node]: ROS was initialized without arguments.
[Msg] Connected to gazebo master @ http://127.0.0.1:11345
[Msg] Publicized address: 192.168.2.103
2.插件节点及其服务介绍
使用3.1中的指令启动Gazebo并加载gazebo_ros插件,我们使用下面的指令来看插件的节点,以及改节点为我们提供的服务有哪些?
节点列表
ros2 node list
正确返回
/gazebo
然后我们看看这个节点对外提供的服务有哪些?
ros2 service list
/delete_entity
/get_model_list
/spawn_entity
/gazebo/describe_parameters
/gazebo/get_parameter_types
/gazebo/get_parameters
/gazebo/list_parameters
/gazebo/set_parameters
/gazebo/set_parameters_atomically
除去和参数相关的几个服务,我们可以看到另外三个特殊服务:
/spawn_entity,用于加载模型到gazebo中/get_model_list,用于获取模型列表/delete_entity,用于删除gazbeo中已经加载的模型
我们想要让gazebo显示出我们配置好的fishbot使用/spawn_entity来加载即可。
接着我们可以来请求服务来加载模型,先带你看一下服务的接口类型。
ros2 service type /spawn_entity
返回
gazebo_msgs/srv/SpawnEntity
指令
ros2 interface show gazebo_msgs/srv/SpawnEntity
返回
string name                       # Name of the entity to be spawned (optional).
string xml                        # Entity XML description as a string, either URDF or SDF.
string robot_namespace            # Spawn robot and all ROS interfaces under this namespace
geometry_msgs/Pose initial_pose   # Initial entity pose.
string reference_frame            # initial_pose is defined relative to the frame of this entity.
                                  # If left empty or "world" or "map", then gazebo world frame is
                                  # used.
                                  # If non-existent entity is specified, an error is returned
                                  # and the entity is not spawned.
---
bool success                      # Return true if spawned successfully.
string status_message             # Comments if available.
可以看到服务的请求内容包括:
- string name ,需要加载的实体的名称 (可选的)。
- string xml ,实体的XML描述字符串, URDF或者SDF。
- string robot_namespace ,产生的机器人和所有的ROS接口的命名空间,多机器人仿真的时候很有用。
- geometry_msgs/Pose initial_pose ,机器人的初始化位置
- string reference_frame ,初始姿态是相对于该实体的frame定义的。如果保持"empty"或"world"或“map”,则使用 gazebo的world作为frame。如果指定了不存在的实体,则会返回错误
3.调用服务加载fishbot
看到这里你是不是迫不及待敲起来命令行来加载我们的机器人到gazebo了,别着急,再推荐一个可视化服务请求工具,其实在第六章中介绍过,在rqt工具集里有一个叫服务请求工具。
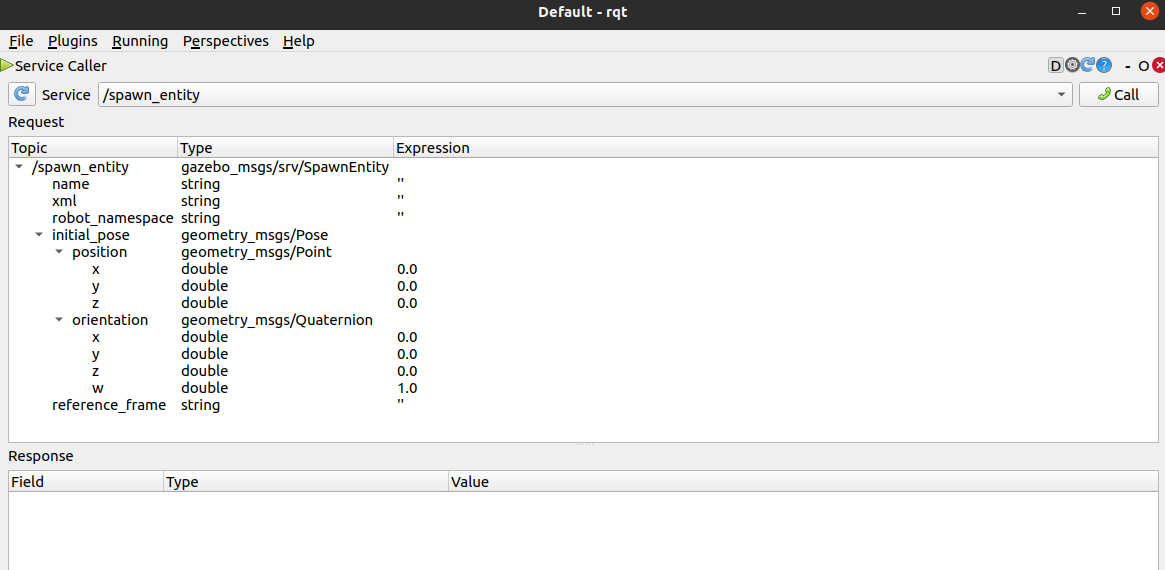
命令行输入rqt,在插件选项中选择Services->Service Caller,然后再下拉框选择/spawn_entity服务,即可看到下面的界面。
接着我们把我们的FishBot的URDF模型复制粘贴,放到xml中(注意要把原来的''删掉哦!),然后拿起我们的小电话Call。
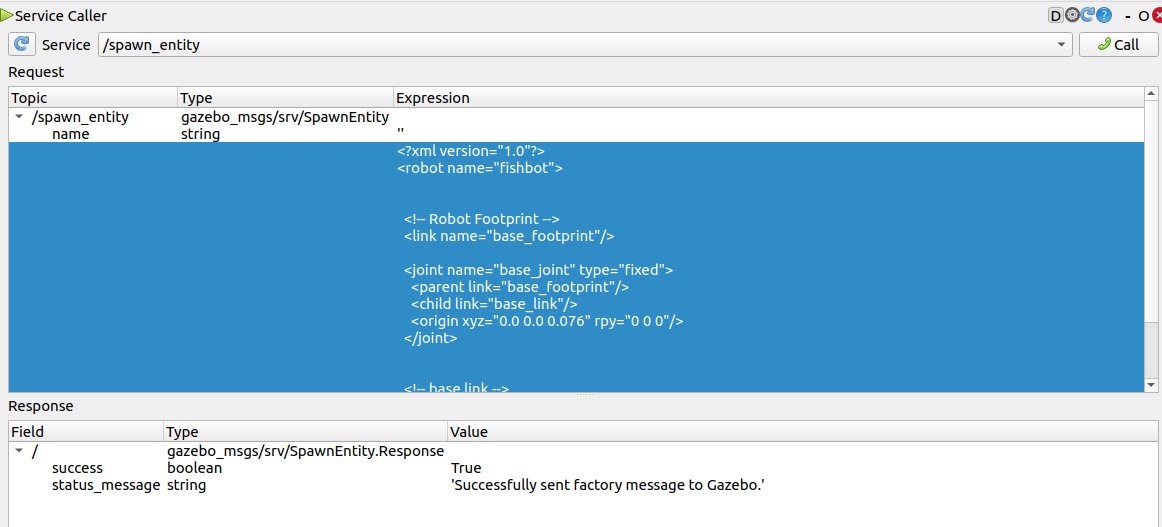
接着就可以看到工厂返回说成功把机器人制作出来送入gazebo了。
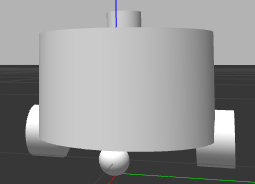
此时再看我们的Gazebo,一个小小的,白白的机器人出现了。
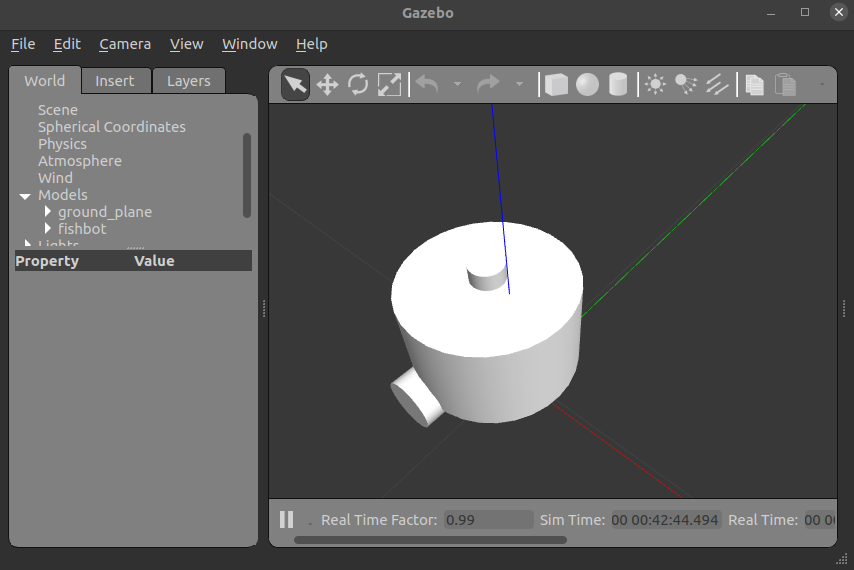
按住Shift加鼠标左键,拖动一下,来好好的欣赏欣赏我们的机器人。
3.4 在不同位置加载多个机器人
欣赏完毕后,再带你生产一个fishbot(为了后面需要多机器人仿真的小伙伴)。
修改rqt中的参数,增加一个命名空间,然后修改一个位置,让第二个机器人和第一个相距1m的地方生产,然后点击Call。
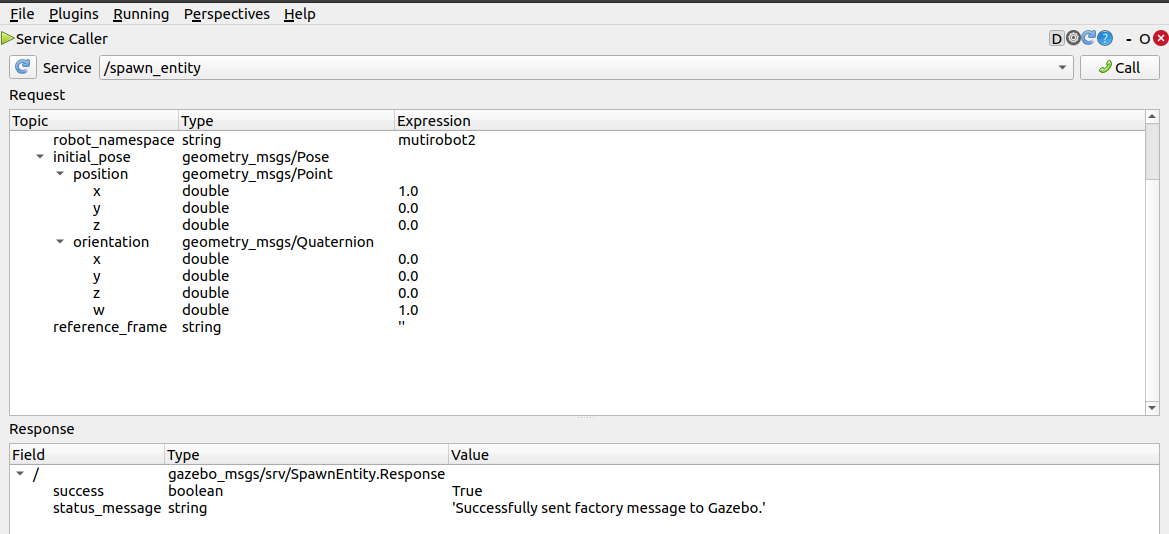
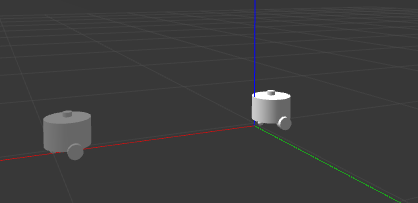
返回成功,此时拖送Gazebo观察一下,发现多出了一个机器人,距离刚好是在X轴(红色)1米(一个小格子一米)处。
3.5 查询和删除机器人
利用rqt工具,我们再对另外两个服务接口进行请求。
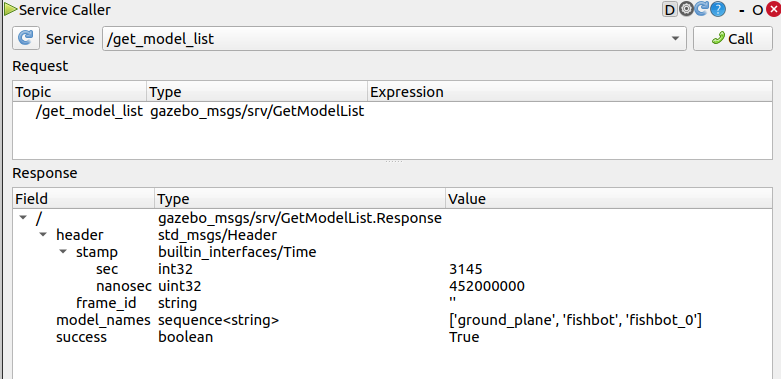
查到了三个模型,一个大地,一个fishbot,一个fishbot_0。
我们接着尝试把fishbot_0删掉,选择删除实体,输入fishbot_0的名字,拿起小电话通知工厂回收我们的0号fishbot。
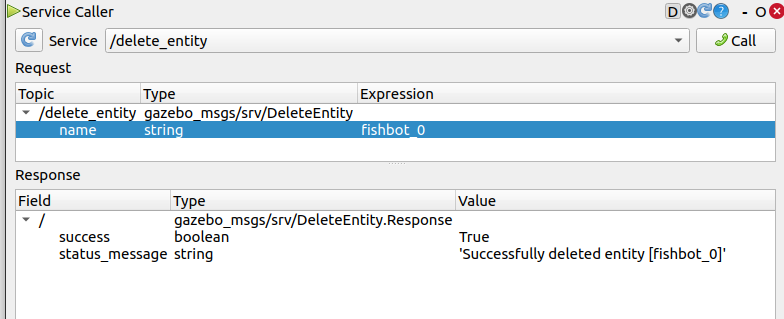
调用成功,观察gazebo发现机器人没了
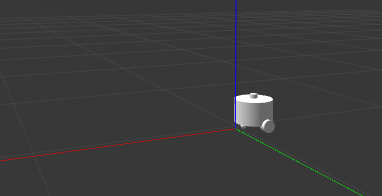
4. 将启动gazebo和生产fishbot写成launch文件
打开fishbot工作空间,在src/fishbot_description/launch中添加一个gazebo.launch.py文件,我们开始编写launch文件来在gazebo中加载机器人模型。
启动gazebo,我们可以将命令行写成一个launch节点
ExecuteProcess(
        cmd=['gazebo', '--verbose','-s', 'libgazebo_ros_init.so', '-s', 'libgazebo_ros_factory.so', gazebo_world_path],
        output='screen')
上面我们加载机器人是直接将XML格式的URDF复制过去进行加载的,这样很不方便,我们可以使用gazebo_ros为我们提供好的一个叫做spawn_entity.py节点,该节点支持从文件地址直接生产机器人到Gazebo。
其实该节点的原理也很简单,从URDF中读取机器人模型,然后再调用服务,和我们手动操作一个样子,只道没差别。
该节点需要两个参数,一个机器人的模型名字和urdf的文件地址,这个简单,前面我们曾经使用package_share来拼接过urdf路径。
spawn_entity_cmd = Node(
    package='gazebo_ros',
    executable='spawn_entity.py',
    arguments=['-entity', robot_name_in_model, '-file', urdf_model_path], output='screen')
最终写好的launch文件如下:
import os
from launch import LaunchDescription
from launch.actions import ExecuteProcess
from launch_ros.actions import Node
from launch_ros.substitutions import FindPackageShare


def generate_launch_description():
    robot_name_in_model = 'fishbot'
    package_name = 'fishbot_description'
    urdf_name = "fishbot_gazebo.urdf"

    ld = LaunchDescription()
    pkg_share = FindPackageShare(package=package_name).find(package_name)
    urdf_model_path = os.path.join(pkg_share, f'urdf/{urdf_name}')

    # Start Gazebo server
    start_gazebo_cmd = ExecuteProcess(
        cmd=['gazebo', '--verbose', '-s', 'libgazebo_ros_init.so', '-s', 'libgazebo_ros_factory.so'],
        output='screen')

    # Launch the robot
    spawn_entity_cmd = Node(
        package='gazebo_ros',
        executable='spawn_entity.py',
        arguments=['-entity', robot_name_in_model, '-file', urdf_model_path], output='screen')

    ld.add_action(start_gazebo_cmd)
    ld.add_action(spawn_entity_cmd)

    return ld
编译运行
colcon build --packages-select fishbot_description
source install/setup.bash
ros2 launch fishbot_description gazebo.launch.py
完美显示
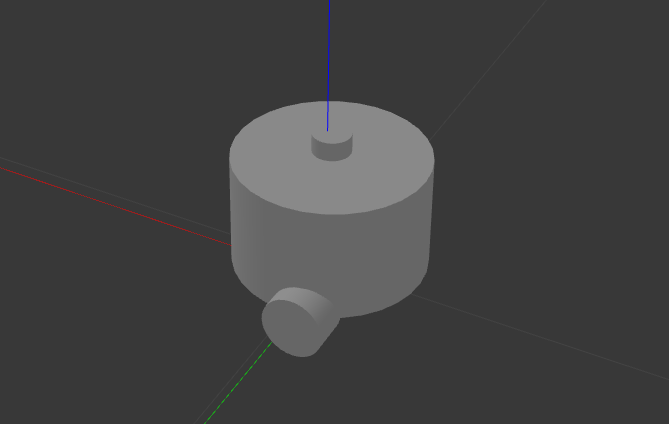
5.总结
这节课我们为Fishbot注入了仿真必须的物理属性,但是机器人还是不会动,下一节课我们就利用Gazebo的其他插件,让我们的机器人动起来。
最后再留一个课后作业:
尝试将fishbot的物理属性去掉,再加载机器人看看会发生什么?
尝试将fishbot的碰撞改成很小,再看看会发生什么?
gazebo还支持link的材料修改,在URDF中添加下面的代码,给支撑轮一个不一样的材质吧,你也可以将reference改成其他link,装点一下你的机器人。
<gazebo reference="caster_link">
    <material>Gazebo/Black</material>
</gazebo>